
Let AI Do the Heavy Lifting #
The import page takes event information from wherever it already lives and turns it into events you review before adding. It accepts three kinds of input: a link to an events page or a calendar, text you type or paste, and an image such as a flyer or poster. Each event comes back with its name, date and time, venue, description, price and more. One event comes back as an editable card; two or more come back as a list you choose from. Nothing is added to your channel until you add it.
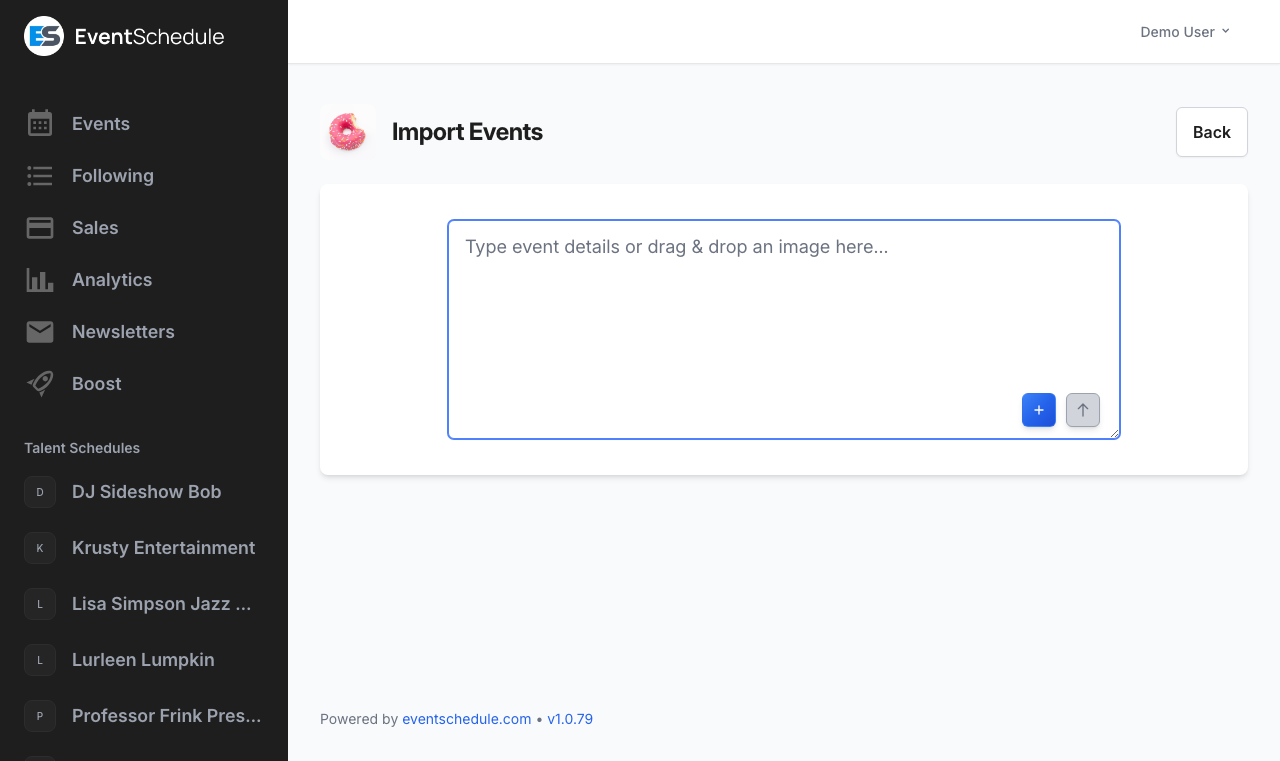
Opening the Import Page #
- Open your channel in the admin panel
- Click Actions in the top right
- Choose Import Events
Under the box, Other ways to bring events in holds Google Calendar, for the channel’s owner, and Import from Eventbrite Pro – Requires the Pro plan , the connector that pulls your events, tickets and venues from a connected Eventbrite account.
A link is a one-time copy
Reading a link copies what is listed there now. Events added to that page or calendar later do not appear on your channel by themselves: read the link again and the ones you already have are left out, or come back unticked. To keep a calendar in step continuously, connect it under Integrations instead.
AI-Powered
Text, images and pages without event data are read by Google Gemini or by OpenAI, whichever is configured. A calendar link, or a page that publishes its events as data, is read directly and involves no AI. On the hosted service everything is ready to use. On a selfhosted install with neither
GEMINI_API_KEYnorOPENAI_API_KEYset, the box takes links only, and an installation admin sees a Get API Key panel marked Optional, see AI Setup.
What You Can Send #
- Link – One web address on its own: an events page, or a calendar. Up to 100 events come back per read
- Text – Up to 10,000 characters per submission
- Image – One JPG, PNG, GIF or WebP file of up to 10 MB per submission. A large photo is shrunk in your browser before it is sent, so a picture straight off a phone camera is fine
- Both together – A flyer plus a line of text covering whatever the flyer leaves out
Daily Limits #
Each text or image submission counts as one AI request, whether it is text, an image or both, and one request can return several events. A link counts only when the AI has to read the page: a calendar feed, or a page that publishes its events as data, is read directly and uses none of the allowance. The allowance is counted per channel per day on the hosted service. When it runs out the page asks you to try again tomorrow.
| Plan | AI import requests per day |
|---|---|
| During a paid-plan trial | 10 |
| Free or Pro | 50 |
| Enterprise | 100 |
| Selfhosted | No limit |
The trial row is checked first, so a channel inside a paid-plan trial gets the trial allowance rather than its plan’s. Separately from the daily count there are two short-term ceilings: 30 submissions a minute, and 10 links a minute. Meeting either shows a message asking you to wait a minute, and it clears on its own.
A venue or curator channel that accepts event requests without requiring visitors to have an account shows those visitors this same AI box instead of a structured form. Their box takes text and images, not links. Their submissions count against the channel’s daily allowance too. See Requests for the submission form options.
Importing from a Link #
Paste the address of the page or calendar where your events are already listed. When the box holds a link and nothing else, a line under it reads We will read this page and the button reads Read link.
- Paste the link into the box. The
https://is optional, soyourvenue.com/eventsworks - Click Read link, or press Ctrl+Enter. The page names the site it is reading, and Cancel stops it
- Review what came back: one event as a card, two or more as a list
- Click Save on a single card, or the button under a list, which carries the number you ticked, for example Add 12 events
| What the link points to | How it is read | Uses AI |
|---|---|---|
A calendar feed: an .ics or webcal:// address | As written, for the next 12 months | No |
| A public Google Calendar link, or a published Outlook calendar page | Swapped for that calendar’s feed address, then read as a feed | No |
| A page that publishes its events as data, the structured event data many website builders and ticketing sites add for search engines | From that data, for the next 12 months | No |
| Any other web page | The page’s main text, up to 10,000 characters, is read the way pasted text is | Yes, one request |
- Repeating events – A repeating calendar entry arrives as one repeating event when your channel can express its rule: daily, weekly on chosen days, every few weeks, monthly or yearly, with an end date or a number of occurrences. A rule it cannot express, such as the last Friday of every month, arrives as one row holding its next 12 dates. So does a series with a moved date, and one whose clock time would drift on your channel because it is set in another time zone
- Time zone – A line above the results reads Times shown in followed by your channel’s time zone, with a link to change it. On a talent or curator channel, an event that states its own time zone keeps its local clock time, so an 8 PM show in another city stays 8 PM, and its row says so
- All-day entries – Shown as All day, and saved starting at midnight for the full day
- Left out – From a calendar or a page’s event data: cancelled entries, entries marked private, past events, and events your channel already has, including dates a repeating event of the same name already covers. The results say how many were left out because you already have them, and how many entries could not be read at all. From a page the AI read, a likely duplicate comes back unticked instead
- More than 100 – A read returns up to 100 events and says how many more there are. Add those, then read the link again for the rest
- Missing some? – When a page’s event data does not cover everything on the page, Missing some? Read the whole page reads the page’s text with AI instead
What a link cannot reach
Facebook and Instagram do not let other sites read their pages, so those links are turned down straight away: add a screenshot of your events instead. A Google Calendar that is not public cannot be read from its link. A page behind a sign-in, or one that only fills in its events after it loads, comes back with no events: paste its text or add a screenshot. Links are read on this import page only, not on the public request form.
Importing from Google Calendar #
When your events live in a Google calendar that is not public, connect it and choose which of its events to bring over. This is for the channel’s owner, and it copies: nothing in your Google calendar is changed.
- On the import page, under Other ways to bring events in, click Google Calendar
- Click Connect Google Calendar. Google asks whether EventWillow may see your calendars, and nothing more: the page says Read-only. We never change your calendar. and that is what is requested
- Back on the import page, pick one calendar under Choose a calendar. Your own calendars come first and the account’s Main calendar last. Google’s holiday, birthday and week-number calendars are not offered
- Click Show events, then tick what you want in the list and add it
- What comes over – The calendar’s events for the next 12 months, up to 100 at a time, read the way a calendar link is: a repeating event as one repeating event, an all-day entry as all day, times in your channel’s time zone
- What is left out – Entries marked private, cancelled entries, invitations you declined, events already on your channel, and things that are not events: birthdays, working locations, out-of-office and focus-time blocks, and entries Google made from your mail. A very long calendar is read in part, and the list says so
- Use a different account – Offered beside the connected address while none of your channels is synced with Google Calendar, since a sync runs on the same connection
- A one-time copy – Events added to that calendar later do not arrive by themselves: choose the calendar again to add them, or turn on a sync under Integrations
Read-only until you say otherwise
A connection made here can read your calendars and cannot write to them. That is enough to import, and to sync from Google Calendar. To send your channel’s events to Google Calendar, open Edit Channel → Integrations → Google Calendar and click Allow at Google. On a selfhosted install the Google Calendar source appears once Google API credentials are set, see the selfhost Google Calendar docs.
Importing from Text #
Copy event information from an email, a website listing, a social media post or a message, and paste it into the import box.
- Type or paste the event text into the box, which reads Paste a link, paste text, or add a flyer while it is empty
- Click Read text at the end of the box, or press Ctrl+Enter. Enter on its own starts a new line
- Review what the AI found and correct anything it got wrong. One event comes back as a card; two or more come back as a list
- Click Save on the card to create the event
- A saved card turns green and offers Edit, View and Clear so you can move straight on to the next import
Example
Pasted text
Live Jazz Night
Friday, March 15th at 8pm
The Blue Note, 123 Main Street
Featuring the John Smith Trio
Tickets: $20| Field | Notes | From the example |
|---|---|---|
| Event name | A short version is also generated for the event URL | Live Jazz Night |
| Date and start time | When no time is given, 8:00 PM is assumed. Both are editable on the card, the date through a picker and the time through a dropdown | March 15, 8:00 PM |
| End time | Worked out from the length the AI reads out of the text, in hours, and added to the start time. Left blank when no end time or length is mentioned. The event’s duration is taken from whatever start and end you save | Left blank |
| Venue and address | Venue name, street address, city, state and postal code, plus a two-letter country code. A curator channel falls back to its own country when the text does not name one | The Blue Note, 123 Main Street |
| Description | Markdown, plus an optional one-line short description of up to 200 characters | Featuring the John Smith Trio |
| Participants | Performer name, email and website. The name is matched first against talent channels in your channel’s country, then against talent already connected to your channel. On a talent channel every imported event is pinned to that talent instead | John Smith Trio |
| Price | Amount and currency code; blank means unknown and 0 means free | 20 USD |
| Category | Chosen from the categories your channel uses, including your custom ones. A near-miss is matched back to the closest name on your list | Concerts |
| Registration URL | An external ticket or sign-up link found in the text | None in this text |
| Custom fields Pro – Requires the Pro plan | Your own event fields are filled in too, matched against their allowed options | None defined |
- Several events at once – Paste a whole list. If the text names several distinct performers the AI splits them into separate events, and events that share a start time and address are merged back into one event with several participants
- Sensible dates only – A parsed date that is more than three days in the past is left blank for you to fill in rather than guessed. This applies to whatever the AI reads; a calendar feed or a page’s own event data keeps the dates it gives
- Other languages – For a channel whose language is not English, the AI keeps the original language and adds English translations alongside it
- Which fields appear – Name, date and time, and venue are always on the card. The extra fields (short description, description, price, coupon code and its discount, registration URL, category and sub-channel) are switched on per channel, and can be marked required. The sub-channel field only appears once the channel has sub-channels
- Performer videos – On a curator channel, when a parsed performer does not match a talent channel you already have, the card searches YouTube for that name and offers up to six clips. Pick one and it becomes the new talent channel’s video
Venue Matching
Rather than creating a duplicate, the import looks for a venue you already have. It checks, in order, a venue channel you own with the same name, then any venue in the same city (and country, when one is known) with a matching name or street address, then venues connected to your channel through past events. Matching ignores case, accents, punctuation and a leading “the”, so “The Blue Note” and “Blue Note” are the same venue. A hit shows as Matched venue and the card’s venue block is set to Use Existing.
- Switch to Create New to enter the name, street address and city yourself
- The venue dropdown groups your options into Member, Following and From past events
- Tick I manage this venue, make me the owner when the new venue is yours to run
- On a venue channel there is nothing to match: every imported event is pinned to that venue
Duplicate Warning
A card shows Similar event found when your channel already has an upcoming event with the same registration URL, or with the same start time plus either the same venue address or the same performer name. View opens the existing event so you can decide whether to save the new one. On a curator channel, Select adds that existing event to your channel instead of creating a second copy.
New Pages and Requests
Saving a card also reaches the performers and the venue it names, in one of two ways:
- Not on EventWillow yet – A performer or venue the import did not match gets a channel page of its own when you save, so your event page can link to them. The page is public but stays out of search engines, says which channel created it, and offers Claim this page, which works for whoever signs in with the email address on it (or its phone number, when it has no email). If that address already belongs to an account, the page is theirs straight away and the event reaches it as a request, as below. Tick I manage this venue, make me the owner to make a new venue yours instead. See Pages Created for Others for claiming and invitations
- Already running a channel – The event is on your channel straight away, but reaches theirs as a request they accept or decline, unless your channel is on their approved list. A performer’s channel always works this way; a venue can choose to accept requests without approval
Importing from Images/Flyers #
Give the AI a flyer, poster or screenshot and it reads the text out of the image.
- Add the image in whichever way suits you: click Add Image to pick a file, paste an image from your clipboard into the box, or drag and drop the file onto the box
- A thumbnail appears in the corner of the box. Use the red x on it to remove the image if you picked the wrong one
- Optionally type a note in the box as well, for anything the flyer leaves out
- Click Read flyer to submit
- Review the card, then click Save
The image you submitted is carried over as the event’s image and shown beside the parsed fields, so a flyer import needs no separate upload. You can remove it there, or drop a different image onto that panel before saving. The one exception is text that also contains a ticket link: that link’s own preview image wins, because it is usually the publisher’s artwork.
Image Tips
One image per submission, in JPG, PNG, GIF or WebP, up to 10 MB. A large photo is shrunk in your browser before it is sent. Use a clear, high-contrast picture where the text is large enough to read: the AI can only extract what is legible. Photograph the flyer flat and in full frame rather than at an angle.
Photographing a printed agenda to create timed parts inside one existing event is a separate feature. See Scan Agenda Enterprise – Requires the Enterprise plan .
Choosing What to Add #
When a read finds two or more events, from a link, from text or from an image, they come back as one list rather than a card each.
- Rows – Each row shows the date, the name, and a line with the time, the venue and how the event repeats
- Ticking – Tick the rows you want. Select all ticks every row that can be added, and the count beside it keeps track, for example 12 of 14 selected
- Details – Click a row to open its full card in place, where every field can be edited. One row is open at a time
- Rows that start unticked – A row missing a name, date or time reads Add a name, date and time. A row that matches an event you already have reads Looks like one you already have. Open the row to fix or check it, then tick it
- Adding – The button at the foot of the list carries the count, for example Add 12 events. While it works a bar reads Saving 3 of 12 and each row shows a tick as it lands. When everything is added you are taken to your channel
- When something does not save – The page stays, says how many were added and how many need attention, and shows the reason on each row concerned. Such a row stays ticked to be tried again: untick it to leave it out
- A series listed by date – One row stands for all of its dates. Ticking, removing or saving it applies to every date, and what you change on its card (its name, its venue) is carried to every date that had the same. A date the calendar gave its own time, name or venue keeps it
- Start over – Clears the results and returns to the empty box, after asking when there are events you have not added yet
On the hosted service a channel can only create so many events in one day. An import that reaches that limit stops there and says so; the rest can be added the next day.
Undoing an Import #
An import ends on your channel, under a panel headed Events added to your channel with the count, the first few names and your channel’s link to copy.
- Add to your website – Opens the embed dialog on the calendar, see Embedding on Your Website
- View channel – Opens the public page your guests see
- Import more – Returns to the import page. After an import of fewer than five events this button reads Add more events and is the one highlighted
- Undo this import – Removes the events that import added, after asking you to confirm
Undo only touches what that import added. Events you created by hand stay, earlier imports stay, and an imported event that someone already holds a ticket or a booking for is kept; the page then says how many were removed and how many were kept.
Undo is offered for 24 hours, in the browser you imported with and while you stay signed in. If you left the import page without finishing, the next time you open it your last import is named at the top with the same Undo this import button.
Custom AI Prompts #
The import page itself has no prompt box: you type event details, not instructions. What the parser knows about your channel comes from the settings below, so this is where you steer it when it keeps getting something wrong.
| Setting | Where to find it | What it does |
|---|---|---|
| AI prompt on a custom field Pro – Requires the Pro plan | Edit channel → Customize → Custom Fields | An optional instruction, up to 500 characters, on how to extract that one field’s value. It is appended to the parser’s instructions for that field |
| Event categories | Edit channel → Customize → Categories | The parser picks a category from your channel’s own list, so renaming or adding categories changes what it can choose |
| Language | Edit channel → Details | Sets the language the parser preserves in the event text, with English translations stored alongside |
| Import Form Fields | Edit channel → Settings → Advanced (hosted service) | A toggle per extra field (short description, description, price, coupon code and its discount, registration URL, category and sub-channels) that chooses which ones appear on each parsed card, each with a Required tick box for fields that must be filled in before the event can be saved |
| Agenda prompt Enterprise – Requires the Enterprise plan | Scan Agenda page → Edit prompt | Free-text instructions for agenda scanning, which creates event parts rather than events. Can be saved as the default for the channel |
Tip
Custom field prompts are worded like instructions to a person. The examples offered in the field editor read “Extract the dress code from the event details” and “Identify the target age group for this event”.
More AI on your events Enterprise – Requires the Enterprise plan
AI can also generate a flyer image from event details you already have, and write an event description and category for you. See AI Flyer Generation and AI Details Generator.
See Also #
- Creating Events – Add events by hand and configure event settings
- Creating Events via WhatsApp – Send a message or flyer to a WhatsApp number and let AI create the event (Enterprise)
- Scan Agenda – Use AI to read a printed agenda and create event parts (Enterprise)
- Auto Import – Have a selfhosted install import events every day from a list of event URLs
- Custom Fields – Define your own event fields, with AI prompts for each (Pro)
Adapted from the Event Schedule user guide. Upstream screenshots are included for reference. Original guide